VPN servers are
great for ANYONE who wishes to stay more secure and anonymous on the
Internet but, perhaps, especially for people downloading Bittorrent files.
The below information
is a detailed guide on how to properly use a VPN server together with
the FREE Bittorrent client Vuze to anonymously download Bittorrent
files, but is valuable information to anyone eager to learn more
about how to stay anonymous on the Internet. VPN servers can be used on desktop computers, cell phones or laptops and are similar to proxy servers where you are assigned a new IP number, perhaps from another
country, but with a few quite important differences. VPN servers
allow their clients to use an encrypted “tunnel” where one can can surf the Internet with a very strong encrypted stream of data going from your computer through
the VPN server and to the Internet - and back. Anyone trying to trace
the source of communication will not see its true origin but only the
VPN server and
its IP number.
What
you do inside the tunnel will
not be visible to your ISP (Internet Service Provider) which is why VPN
servers are excellent to use in countries where human rights are being
suppressed, such as in China, North Korea, Syria, Iran the U.S. and
similar countries where the government do not wish their citizens to
experience true Internet freedom.


Now, the first thing you need to do is find out your real IP number and write it down BEFORE
you connect to any VPN server. This is a simple task and can be accomplished by visiting http://www.dnsleaktest.com/
It can be difficult to know which VPN server to choose but one that offers OpenVPN (an open source application that implements VPN techniques for creating secure point-to-point or site-to-site connections) with a 2048-bit RSA and a 128-bit Blowfish encryption would be a pretty good start. You would also want to know that the VPN keeps no, or very few, log files and that using it won't slow your download speed down too much. Always do a TRIAL period before you pay for a VPN.
https://torrentfreak.com/which-vpn-providers-really-take-anonymity-seriously-111007
After you have
installed the VPN software needed and connected to a VPN service such as "CyberGhost" or "Mullvad"(http://cyberghostvpn.com/ and https://www.mullvad.net/en/services.php) or any other VPN
server of your choice, please visit http://www.dnsleaktest.com/ and look at the IP number listed on the screen.
Is it your real IP number, as listed there earlier when you wrote your IP number down? If not, the IP number seen on the screen is your VPN server's IP number. Since you are now connected to the VPN server, your real IP number should of course NOT be listed here.
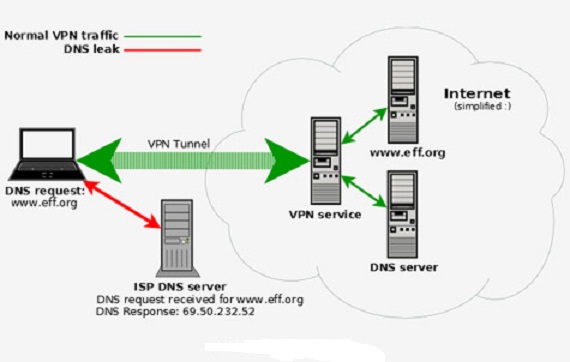
If your VPN servers IP number is listed, rather than your real IP number, things look pretty good, but you now need to find out whether there are any DNS leaks or not. How to do that, you ask? Simply click on the button at http://www.dnsleaktest.com/ where it says “Check for DNS leaks now!”.
You will see one or possibly many DNS servers and flags listed there. You should NOT see the name of your ISP listed together with the flag of the country where you are currently located. If you do, you have a DNS leak and this must be fixed before you can download any Bittorrent files, or your anonymity is likely to be compromised.
How to fix that? Fortunately there is a FREE solution for that. Simply install "DNSFix" from http://www.dnsleaktest.com/.
After installation, when you connect to a VPN server, a batch file will run executing the three steps described as below. Three scripts are generated for each OpenVPN configuration file;
- configfilename_pre.bat - executed before the connection is
established - Calls pre.vbs - If any active DHCP adapters exist, switch to
static use
- configfilename_up.bat - executed when the connection is established - Calls up.vbs - Clear the DNS servers for all active adapter except the "TAP32 adapter"
- configfilename_down.bat - executed after the connection is disconnected - Calls down.vbs - Reconfigure adapters back to their original configuration
Now go back to http://www.dnsleaktest.com/ and click on “Check for DNS leaks now!” again (hit refresh first by clicking F5 a few times on your keyboard) and this time you should not see any DNS servers listed that are related to your real ISP, or country.
With all of the above done, you are now ready for the next step on how to configure your computer to ensure anonymity.
If you are on Windows 7 or Vista, click START  > Control Panel > Network
and Sharing Center and choose “Change Advanced Sharing Settings”.
Choose to turn OFF “Network discovery” as well as file and
printer sharing. Also turn OFF "Media Streaming", unless you know you will want to use it.
> Control Panel > Network
and Sharing Center and choose “Change Advanced Sharing Settings”.
Choose to turn OFF “Network discovery” as well as file and
printer sharing. Also turn OFF "Media Streaming", unless you know you will want to use it.

After that, turn off “Public Folder Sharing” too. Under “File Sharing Connections”, choose the 128-bit encryption, just in case. Under “Password protected sharing”, choose to “turn ON password protected sharing”. Now, under Homegroup Connections, choose “use user accounts and passwords to connect to other computers”. Under "Public" – do the same.

Now that you have done that,
you are going to do something else. Click START then
right click on “Computer” and choose “Properties”. Click on “Remote Settings”
and UNCHECK
“Allow remote assistance connections to this computer” unless you know this is something you will want to use.
Now, in the Network and Sharing center, click on “Change adapter settings”. You will see an adapter called “Tap Win 32” or something of that nature. Right click on its logo and choose “Properties” and under “Networking” simply click “Configure”. You can now see 4 options “General”, “Advanced”, “Driver” and “Details”. Click on “Advanced” and look for “Non-Admin access” and have the value changed from "Allowed" to “Not allowed”, then click “Ok”.
Make sure you do the same thing on your own network adapter as well, by following the same procedure. Your own network will be the adapter to the left of the Tap Win 32 adapter, in the menu.

Now it's time to install a Bittorrent client. Our choice is Vuze which can be downloaded from https://www.vuze.com/
Vuze is FREE, will help you download Bittorrent files and has very easy-to-use search functions.
![]()
You may want to check out the below links to get some search templates for Vuze:
https://sites.google.com/site/vuzetemplates/home/templates-download
and https://www.techsupportalert.com/vuze-meta-search-templates
 Since most, if not all, traffic-snooping technology today uses trackers to gather their data, it's a good idea to avoid going through a central Bittorrent tracker and rely on DHT and PEX instead. These features are enabled by default in Vuze.
However, once Vuze is installed, you need to do a few tweakings of your own. First, open Vuze and click Options followed by Advanced settings. Select Connection > Advanced Network Settings. One of the options you will now find is "Bind to local IP address or interface" and below that, should be listed all the available IP addresses and interfaces. One of those interfaces should be your VPN connection and its IP number. For safety reasons, please check "Enforce IP bindings even when interfaces are not available". Now Vuze will use only that interface (your VPN server) whenever its available.
Uncheck the
option that enables UDP tracker(s) by clicking Tools > Options >Tracker >Client and uncheck both where it says "Enable UDP tracker client
protocol" and "Enable UDP tracker probe for HTTP trackers".
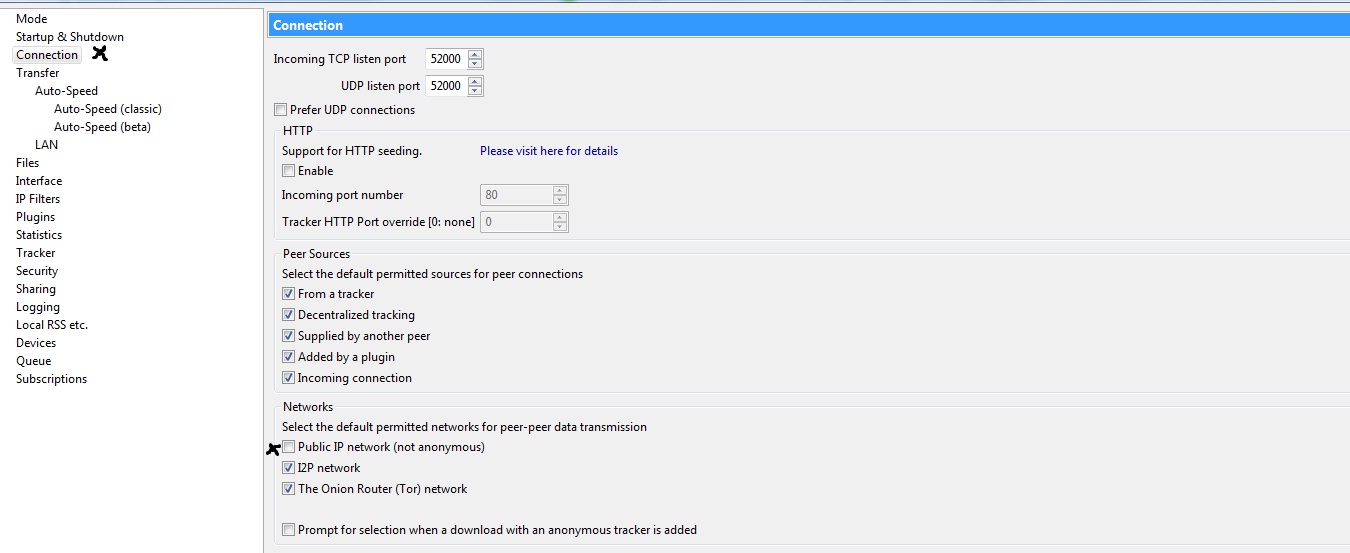
Under "Server", uncheck (if it's not already unchecked by default) the option "Enable UDP tracker protocol". Under Connection >Networks, please uncheck "Public IP network (not anonymous)".
The final Vuze configuration you need to do is not really a true 'security' option. It's only meant to bypass
deep-packet inspection (by encrypting the Bittorrent packet headers) for Bittorrent throttling (i.e. Comcast and other major ISPs
simply seeing the Bittorrent fields and automatically throttling those
connections) but thus ensures that passive listeners can not determine what you're
downloading. Click Options > Connection > Transport Encryption, check "Require encrypted transport" and set the "Minimum encryption level" to RC4.

How to turn IPv6 off on Windows 7 and why doing so is important:
1. Click on START and choose
"Control Panel".
2. Click "Network and Sharing Center".
3. Choose "Change Adapter Settings" and you will see your Local Area Connection listed. Right click it and choose Properties.
4. Under Networking you will now see Internet Protocol Version 6 (TCP/IPv6).
5. Uncheck the box with Internet Protocol Version 6 (TCP/IPv6).


IPv6 is the new Internet protocol you might say. We are running out of IP addresses in the world and IPv6 will hopefully fix that. So far, so good. The problem, however, is that IPv6 can also be used to exploit security holes.
Since IPv6 is not required (yet) to surf the Internet it's safe to turn it off. Turing it off will increase safety if you use Bittorrent software(s). In the below link you can read more about why IPv6 is not safe to use:
https://torrentfreak.com/huge-security-flaw-makes-vpns-useless-for-bittorrent-100617
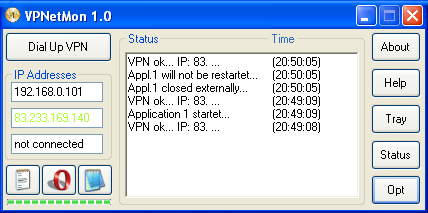
To protect yourself against the event of VPN failure (through bug or by disconnection), DISABLE any Internet access that doesn't tunnel through your VPN service provider. How to do that you ask?
Simply download VPNetmon, a program that prevents unsecured connections if your VPN goes down.
You can download it for FREE at http://vpnetmon.webs.com/
Now it's time to SPOOF (fake) your MAC address. What is a MAC address, you ask? MAC stands for Media Access Control address and is a unique identifier assigned to network interfaces for communications on the physical network segment. No two MAC addresses are the same and thus a MAC address can be used to identify YOU.
Now,
you may not be able to change a MAC address, but you can most certainly
fake one.
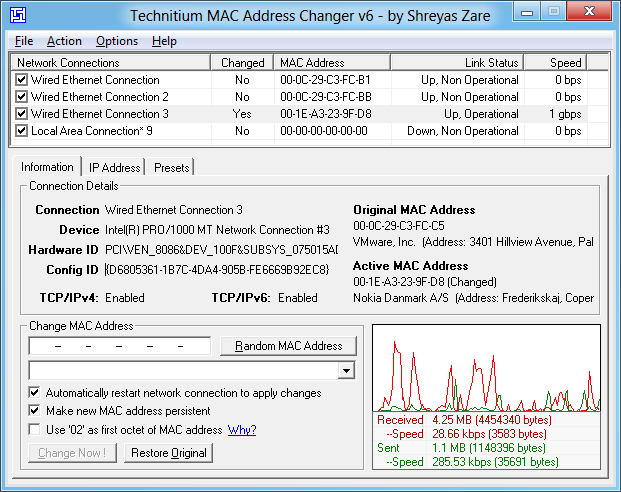
First
visit http://www.technitium.com/tmac/index.html and
download Technitium MAC address changer. It’s FREE to use.
After installation, run the
program as "Administrator" and once the program opens you will see a list of two
or more so called "Local
Area Connections". You have some buttons
there too, called "Information", "IP Address" and so on.
To find
out what your real MAC address (es) are, click START and type cmd.exe in the search field. Once you see cmd.exe, right click it
and run it as "Administrator". In the command prompt field, type ipconfig /all
and you will see what IP number and MAC address(es) etc. your network adapters
have. Exit the command prompt and change them all if possible. This is done by
marking (in the MAC address Changer program) the Local Area Connection and
choosing (under change MAC address) a new one by your choice. Yes, it's as simple as that!
Changing
your MAC address will help covering
your tracks, not because you're doing something illegal, but because you want your privacy. Now that you have done all of the above configurations and installations, it's time to TEST if you truly are anonymous while
downloading Bittorrent files.
Make sure your VPN server is turned ON and your Vuze is turned OFF, then visit http://checkmytorrentip.com/and click "Generate Torrent" followed by "Generate Tracking Torrent". A download will start. Save the downloaded file on your desktop. After you have done that you must turn Vuze on. Once Vuze is turned on, please click File > Open > Torrent file and on the menu that pops up click "Add files" and choose the saved file on your desktop. After this is done please restart Vuze and go back to http://checkmytorrentip.com where you need to hit refresh (F5) a few times. The IP number and country listed now should NOT be your real IP number or the country where you are currently located, but rather your VPNs IP and the country where its IP number is located. Under UDP, on the same webpage, it should now say "NO".
Restart Vuze again and check the "error message" in yellow on the bottom right of Vuze after it has restarted. Is the IP number listed in that “error message” your real IP or the VPN servers IP? It should be the IP of your VPN server. If it is, you have set everything up correct. Congrats!
When you worry a bit extra about anonymity, pay for your VPN with an un-trackable currency. Signup for an anonymous Email account described earlier in this FAQ and
use a Bitcoin Mixer to send Bitcoins to a newly generated address in
your local wallet. Alternatively, use the Bitcoin-OTC to purchase Bitcoins ‘over the counter’ from a person, rather than an exchange. Then, use a patched Bitcoin client, such as coderrr’s anonymity patch to avoid linking the newly generated address to any of your pre-existing Bitcoin addresses.
 Please do not forget that if you do something TRULY and HIGHLY ILLEGAL most VPN servers WILL cooperate with Law enforcment - if presented with a court order. VPN services should not be abused or you will ruin for those of us who simply value our privacy in a society where there is almost no privacy left.
http://blog.hidemyass.com/2011/09/23/lulzsec-fiasco/
How to chain VPN servers, use a hidden OS and ultra-encrypt your computer. (ADVANCED)
This is a bit more advanced than the usual stuff
so if you are not familiar with VPN servers and encryption, please learn first, before you try the following. The below is written for those
already familiar with pretty advanced stuff and thus the explanations are
limited mostly to links and hints.
Alright, so you are familiar with PGP Whole Disk Encryption, you are using a VPN server to be able to go online under a different IP number than the one given to you by your ISP and to ensure traffic to and from your computer is encrypted to everyone, including your ISP. You are using a key-scrambling software preventing outsiders from intercepting what you type on your computer and you are using pass-phrases not passwords and you are always assuming anyone trying to brute force your pass-phrases would use machines capable of calculating at least 16 quadrillion operations per second, thus your pass-phrase(s) would look like ”!My Passw0rd Is H0pefully Quite 0Kt0Use2012Kn0ck0n W00d!” rather than ”mypasswordiscool”
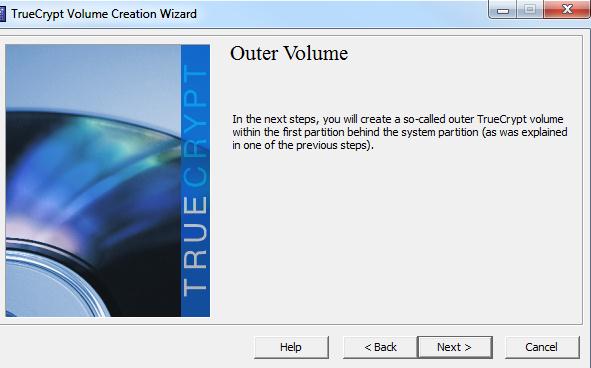
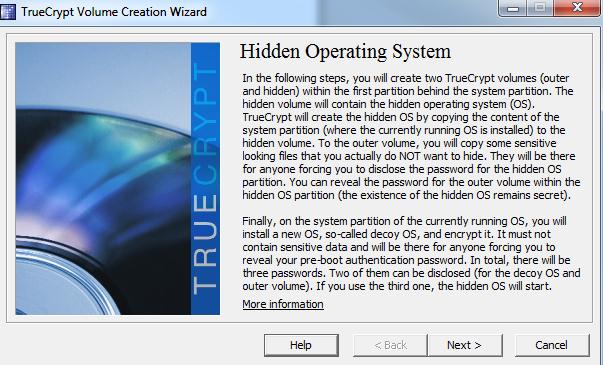
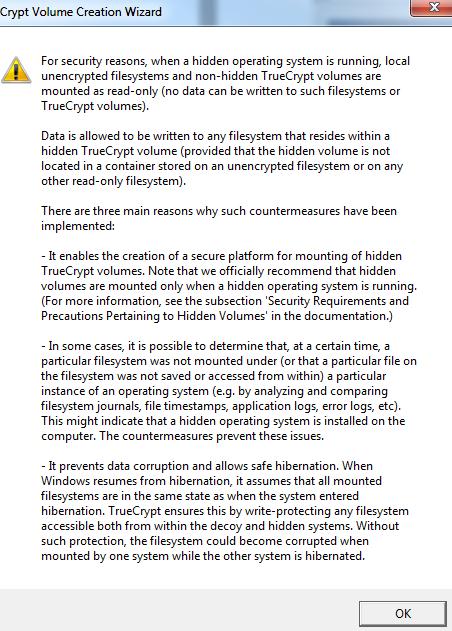
Wanna chain your VPN server on a hidden OS, inside a virtual machine? Want your computer to be impossible to start up without typing a pass-phrase (PGP WDE) and once logged in, be able to switch to a HIDDEN Operating System (encrypted by TrueCrypt)? Want all your Bittorrent downloads to automatically be encrypted and stored safely? So, what do you need in order to pull this off? You will need PGP, TrueCrypt, OpenVPN, VirtualBox and two VPN servers.
http://download.virtualbox.org/virtualbox/4.1.6/VirtualBox-4.1.6-74713-Win.exe
http://www.symantec.com/whole-disk-encryptionhttp://www.truecrypt.org/docs/?s=hidden-operating-system
http://power-byte.wonderhowto.com/how-to/mastering-security-part-2-create-home-vpn-tunnel-0130261/
http://lifehacker.com/5204434/the-beginners-guide-to-creating-virtual-machines-with-virtualbox
https://www.youtube.com/watch?v=8S28SrhrqXs
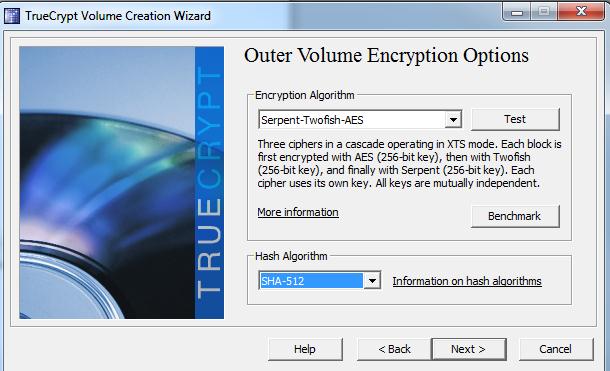
Since you're already using a VPN server and PGP
WDE, together with a key-scrambler, the print screens below should be pretty
self explanatory but it’s important that you choose ”Serpent-Twofish-AES” as
the encryption algorithm to ensure MAXIMUM protection. 


Start up your virtual machine, and configure it. Connect to VPN server 1 within your main OS. Start up your virtual machine and connect VPN Server 2 with it. Operate from within the virtual machine and simply create a True Crypt directory where all your downloaded files will end up. If you use Vuze, just browse to that directory and save the settings.
Now your computer uses PGP WDE when turned
on, making it impossible for anyone to use your computer unless they know your
pass-phrase. When logged on, you are now using a hidden Truecrypt volume (of course
using totally different pass-phrases etc than for PGP WDE), you
are hooked up to a VPN server, and your VPN server is now connecting to a
second computer (your virtual machine) and from there connecting to a second
VPN server.